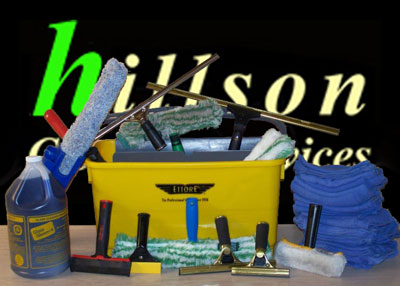
The excellent results achieved by professional window cleaners comes as a result of many hours of intensive work where one learns the tricks of the trade, whether it be via a schooled professional or more commonly trial and error. I previously listed the equipment commonly used by professionals when cleaning windows and will now explain the technique I use to employ this equipment. Follow this guide and you too can have windows that glisten with that much wanted professional touch.
 The first step is to fill the bucket with water and add your detergent; my personal choice is Morning Fresh, this will assist in lubricating your squeegee to glide over the surface of the glass. Next add methylated spirits to your water, I do this so as to aid evaporation which helps prevent streaks.
We’ll assume the windows we are to clean are free of debris; we’ll look at tips on cleaning windows after a builders clean in a later post. First I would apply the detergent to the glass using my washer. In the event the glass hasn’t been cleaned for quite some time and is covered in grime the doodle bug with its scouring pad will be useful in scrubbing the window. Ensure the pad and the glass are free of any debris that may scratch the window pane. You will eventually develop a feel of the doodle bug and notice that it glides so much easier as it frees the window of its grime.
With the glass now covered in your cleaning solution we take a hold of our squeegee and look to the top of the window. Apply the rubber corner of the squeegee along the edge of the glass or you could use a cloth, make sure the cloth is free of lint, like a microfibre. The purpose of wiping the top edge is to prevent solution running down your glass when you squeegee the solution off the glass.
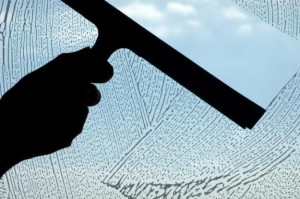
For the novice let’s begin with the easiest technique. Place the squeegee horizontally at the top left of the window. Now run the squeegee straight down the window in a vertical direction. Keep constant pressure on the window all the way down to the bottom, with practice you will develop a feel as to how much pressure on the squeegee you will require, too little or too much will leave streaks. Wipe your rubber with a cloth then return to the top and repeat this action to the right side of the area just cleaned, have the squeegee overlap the cleaned area by about 3 cm, repeat this until you reach the right side of the window.
The window is now clean so let’s dry the side and top edges with a dry cloth, using your finger to run along the edges. At the bottom of the window you will need to mop up the excess water on the sill then use your dry cloth to dry the bottom edge.
Step back and inspect your work. Look from different directions to try to detect any streaks or marks left on the pane. Marks can appear from different angles. Should you detect any streaks use your dry lint free cloth. If there are too many streaks then it’s easier to start the process again by applying the solution to the window. For stubborn marks I tend to use grade 0000 steel wool, designed for polishing glass. Of course the window isn’t truly cleaned until both sides are done.
A couple of warnings, on hot days your solution can evaporate quickly, this can cause friction with your squeegee on the glass resulting in streaks. Also, your worst enemy is the sun. A window that looks perfectly clean in the morning may show horrible streaks once the sun shines through so the key is to develop a keen eye for spotting those marks on your window.
For the next technique, again for novices, run your dry cloth down the left edge of the pane. Now hold the squeegee vertically and place it along the left edge of the window at the top. Run the squeegee straight across the window in a horizontal direction. Keep constant pressure on the window all the way across to the right side of the window. Wipe your rubber with a cloth then return to the left and repeat this action to the bottom of the area just cleaned, have the squeegee overlap the cleaned area by about 3 cm, repeat this until you reach the bottom of the window.
The technique most professionals use is to glide the squeegee across the window in one fluid motion, without lifting the rubber blade, to prevent stopping and starting. This speeds up the process. I start at the bottom left side of the window, move upwards to the top of the window, with the squeegee slopped towards the centre of the glass to allow for run off. Then without lifting the blade, move across the top then down the right side, all the way pushing the detergent to the centre of the glass. Again, without lifting the blade, move to the top of the window, overlapping the cleaned area by a few centimetres and always pushing the solution to the centre. Now snake your squeegee down the glass to the bottom. Mop up the sill, dry the edges, step back and inspect. Correct any blemishes then you’re done.
So there you have it, gleaming clean windows, just like the professionals.

 What’s the best way to clean microfibre? Your microfibre cloth can be rinsed clean and wrung out as your using it. For best results launder it with detergent (never use fabric softener).